
Interior painting looks simple from the driveway. Inside the house, the finish only looks clean if the rooms were ready for it. Furniture in the way, floors left open, holes left unpatched, or damp spots painted over all show up later as chips, telegraphing repairs, or sticky doors.
This guide walks through what to do before the brushes come out — whether you are hiring a crew or doing parts of the prep yourself. It is general guidance for homes around Lake Tapps, Enumclaw, Maple Valley, and Covington. The right plan for your house still depends on the rooms, the paint already on the walls, and whether the house was built before 1978.
Decide the scope before you move a sofa
Start with a short written list: which rooms, which surfaces, and what stays the same. Walls only? Ceilings too? Doors, casing, baseboards, and window trim? Kitchen cabinets are a different project from a bedroom refresh, and mixing them into one vague “paint the house” request makes scheduling harder for everyone.
Walk each room in daylight and with the lights on. Mark nail pops, corner cracks, water stains, shiny patches from old repairs, and places where doors rub the jamb. Those notes become the punch list for patching and priming. If you already have a color or sheen in mind, write it next to the room so decisions are not made under a ladder.
Clear, cover, and protect
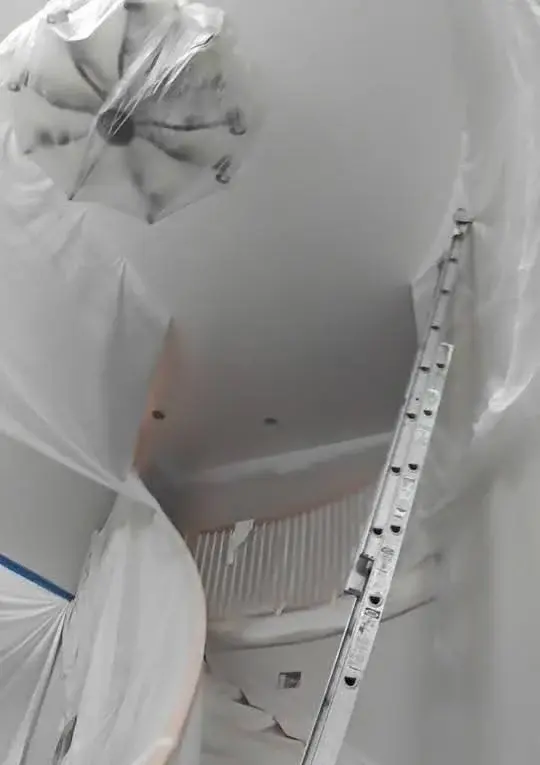
Empty the room as much as you can. Small items, wall art, curtains, and closet contents should leave before any sanding starts. Large furniture that cannot leave the room gets pulled to the center and wrapped so dust and overspray stay off fabric and wood.
Floors need a continuous cover that is taped at the edges, not a loose drop cloth that slides underfoot. Hardware you care about — switch plates, cabinet pulls, door stops — comes off and goes in labeled bags. Leave thermostat covers and smoke detectors alone unless the painter agrees to handle them; moving life-safety devices without a plan creates problems that paint cannot fix.
- Take down art, mirrors, and window treatments.
- Bag and label outlet covers, switch plates, and removable hardware.
- Move or tightly wrap furniture; cover floors wall to wall.
- Plan a clean path for the household so kids and pets stay out of active rooms.

Fix the surface, then choose primer
Paint will not hide a soft spot, a shiny joint compound smear, or chalky old enamel. Scrape loose material, drive nail pops, and fill holes and cracks. Sand repairs flush so they do not flash under the new coat. Glossy trim and previously oil-based surfaces often need a bonding primer so the new paint grips instead of peeling at the first bump.
Stains from water, smoke, or markers need a stain-blocking primer, not a second coat of wall paint hoping they disappear. If a stain keeps returning after priming, stop and find the moisture source — painting over an active leak only buys a short delay.
Our repairs and carpentry work often runs ahead of paint when trim is broken, casing is missing, or a door no longer fits the opening. Getting those fixes done first keeps the paint schedule honest.
Sheen and color choices that hold up
Sheen is not decoration alone. Flatter finishes hide wall imperfections better and suit most ceilings and low-traffic walls. Eggshell and satin clean more easily on family-room walls and hallways that get handprints. Semi-gloss or gloss belongs on trim, doors, and many bathrooms and kitchens where moisture and scrubbing are common — as long as the surface was prepped so the shinier film does not spotlight every ridge.
Keep sheen consistent within a room’s walls, and change it on purpose at the trim. Mixing random leftover sheens on the same wall is a common DIY tell. For color, test large samples on more than one wall and look at them morning and evening; western Washington light is cool and gray for much of the year, so a color that felt warm in the store can read cooler at home.
Older homes and lead-safe work
If your house was built before 1978, assume painted surfaces may contain lead-based paint until testing says otherwise. The federal government banned consumer lead-based paint that year, and the EPA’s Renovation, Repair and Painting program explains how disturbing old paint can create hazardous dust.
EPA recommends hiring a lead-safe certified contractor for renovation, repair, or painting in pre-1978 homes. Its DIY lead-safe renovation guidance also covers containing the work area, keeping children and pregnant people out, using methods that limit dust, and cleaning thoroughly with HEPA vacuuming and wet wiping. Do not dry-sand large areas of unknown old paint as a casual prep step.

Air, odor, and living through the job
Paint products release volatile organic compounds (VOCs) as they dry. The EPA’s overview of VOCs and indoor air notes that concentrations can be much higher indoors than outdoors, especially during and right after use. Its Care for Your Air guide also points to source control and ventilation as the main ways to improve indoor air.
Practical steps help: open windows when weather allows, run exhaust fans, keep unused rooms closed off, and follow the product label for re-entry and dry times. Low-VOC products reduce odor for many households, but “low VOC” is not the same as “no ventilation needed.” Plan meals and sleeping arrangements so freshly coated rooms can dry without people camping in them overnight.
- Confirm heat or AC will stay in a normal range so coatings cure as the label expects.
- Ask which rooms will be off-limits each day and where bathrooms remain open.
- Keep pets and kids out of active rooms until cleanup is done.
- Save leftover labeled cans for touch-ups; write the room and date on the lid.
When to call Lane HBS
If you want the prep and the paint handled together, Lane Home & Business Services does interior painting in occupied homes across Lake Tapps, Enumclaw, Maple Valley, Covington, and nearby. We can also handle related remodeling and carpentry repairs before coatings go on.
For outdoor timing and deck finishes, see our posts on when to paint your exterior and deck stain vs. paint. Call or text (253) 414-3937 or request a free estimate, and we will walk the rooms with you.
